Friday, June 16, 2017

Easy 4th of July Tie-Dye Shirts!


   I can't believe we are half way through June already! School just got out for us no the 14th and we have hit the summer running!  I thought a really fun project would be to make tie-dye shirts for the 4th. Now I have to admit I am not that great at it. I've tried in the past and failed but this round I found my groove and thought I would share my fool proof dying with you!


Here's what you'll need (Be sure to check Michaels Craft Stores for Sales and Coupons!):


  • White Shirts ( Here from Michaels Reg $3.99)
  • Tulip One Step Tie-Dye Kit (Here from Michaels Reg. $6.49 for one color)
  • Plastic Wrap 
  • Clothespin (optional)
*Michael's or Hobby Lobby always have sales an coupons and you can find these products pretty cheap. Also the Tulip kits also comes with a brochure about different ways to dye to create different designs.


Instructions:


  • I used cling wrap to stick to my counter top to cover it while I was dying. You can also set this up outside, but I would still recommend putting something down to protect your surface.
  • Open the Tulip Dye Kit that comes with the dye (it states enough for 3 shirts, but for kids probably more), plastic gloves, and rubber bands.
  • I highly recommend once removing all pricing stickers taking the shirt and dousing it in water. (I will show why at the end.) Wring it out so it is damp.


  • Using the clothespin or your fingers, pinch any where you want your starburst center to be and begin to twist the shirt in a clockwise fashion. As you can see in the picture the whole shirt just naturally begins folding into the circular design.


  • Here is what it will look like once it's completely spun. Now you will just add rubber bands.


  • I used 4 rubber bands. I just kept directing them down the middle in different directions, like cutting a cake .... They don't have to be perfect. And your shape may feel like its getting out but believe me its not.


WEAR GLOVES!
When dying the fabric remember that it will bleed. So dye each side with the one color if you are looking for that patriotic look.
It will bleed naturally.


Now wrap in plastic wrap or in a plastic bag and just set aside to allow the dye to saturate the fabric.

Tulip says 6-8 hours, but the longer the better. It will help the color stay more vibrant once you rinse it out. So I recommend at least 10-12 hours.


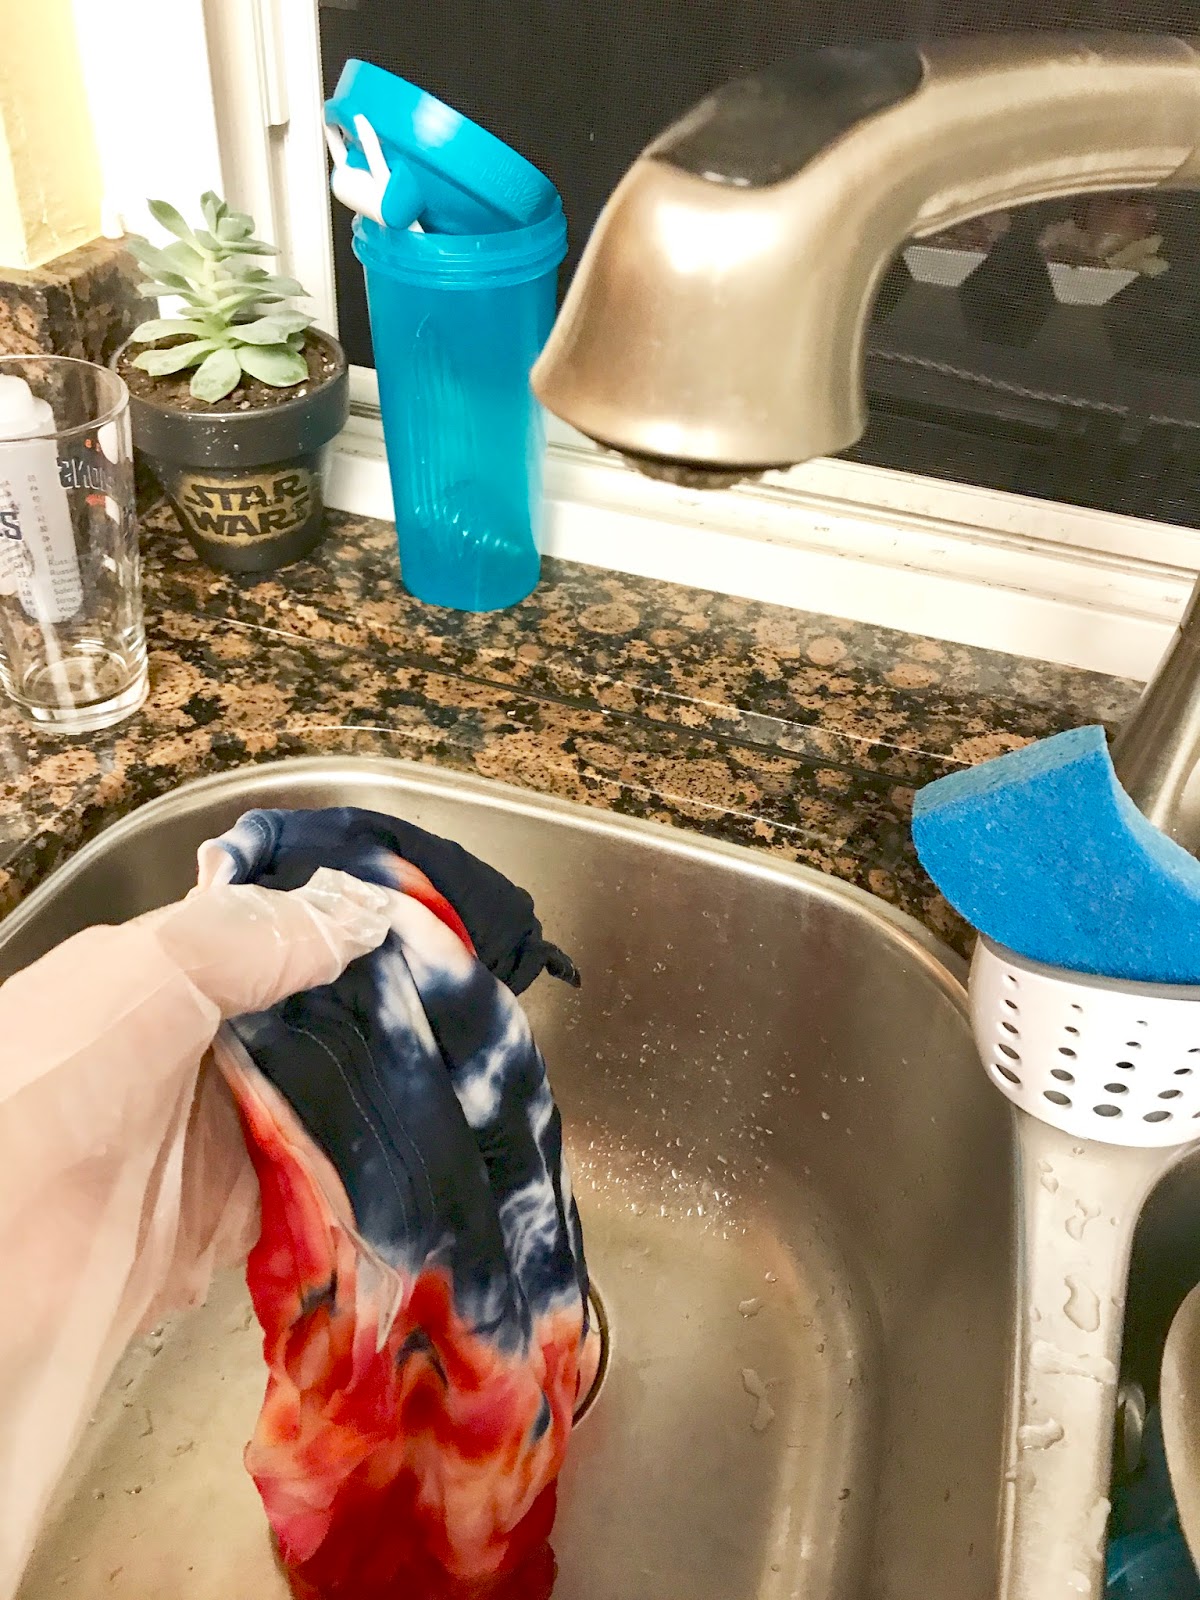
Put on the gloves again and take out of the plastic and remove rubber bands. You can now discard those items and rinse your shirt out in cold water. I rinse until the water runs clear to remove all extra dye. Once they are rinsed I hand them up outside to dry.


Here they are finished and dry.... Now here is where the damp shirt difference comes in. I didn't get the second shirt wet and spun and rubber banded it but found the dye was just sitting on top and not soaking in so I wet the shirt AFTER I already put on the rubber bands. So you can see the same shirt with the same design but dyed dry versus wet changes the look.


Both shirts are great in their own way! The dry shirt reminded me more of fireworks! My girls love them and I'm on my way to Michaels to get a shirt for myself now too! 

Once dry I like to throw the shirts in the washer to make sure all the coloring is secure and the extra is out. WASH ALONE! Just do a small load with the shirts. Because you will dye on the first few washes anything else in there! After that it's business as usual! 

Sunday, June 11, 2017

End of the Year Flamingo Crayon Gift!

I'm one of those people that can walk around the Dollar Store and see something I know can be used for a fun craft! I mean I'm just that mom... which has it's ups and downs. You know what I mean if you're one of "those" moms too!

So this weekend I got away from the family and went to the 99 Cent Only store and found they had this cute Flamingo ice cube silicon tray. I thought it would be perfect for little flamingo crayons to give away to my daughters Kindergarten classmates for the end of the year. You see just last week they went on a Field Trip to the San Diego Zoo where of course we saw Flamingos!


Having kids you know how many crayons can accumulate in your house. So I went through out container and picked out all the white, pinks, peachy, and reddish colors that I have seen in Flamingos.

So here is a quick little tutorial on how to make these or any type of crayon easily using a silicone mold! The best part is you can use any silicone mold to make these! So the options and occasions are endless! I've used these to make Lego themed crayons for a Goody Bag and Dino themed.... you get what I mean!
(I've included links to where I purchased my supplies if available.)


Ingredients:

  • Silicone Mold (Here's the Lego One I used on Amazon)
  • Crayons
  • Oven or Microwave
  • Avery Printable Business Cards (Here on Amazon) Or any card
  • Dual Adhesive Foam Mounting (Here) or any type of double sided adhesive


Instructions:

  1. First you will want to cut off and peel the wrappers from the crayons. I found using an X-Acto knife was really easy to slice the paper and then peel it off. 
  2. Then you will cut the crayons down into smaller pieces. This is how you will get the marble look.
  3. place the pieces in the molds of the silicone tray and fill it to the top. 


  4. I place the tray on a cookie sheet and put in the oven between 250 - 300 degrees. Now here it will take maybe 5-10 minutes depending on how warm the oven is when you place them in. They are done when all the crayon pieces are melted down. (Try not to over heat as it can leave a milky waxing coating and burn the crayons) You can also put the mold into your microwave and in 45-60 second bursts melt down the crayons. I just found the oven to be a quicker way to do this. 
  5. Take out of the oven to let cool. To cool more quickly place them in the freezer or refrigerator. 
  6. Once hardened you can just "pop" them out of the mold in order to use again! 
  7. I used Avery.com to print on their easy business cards, but you can use any type of Word like program and card stock to print your message on. 
  8. Use the foam squares or your double adhesive to attach the crayons to your card. Foam mounting does work best because your crayons may have a bit of an indent in the back. 


The possibilities are truly endless! I have also placed the crayons in an old soup can in a pot of water on the stove top to create a double boiler and melted a single color down to pour into the molds. Although this way is a bit more labor intensive and definitely messy but does create a beautiful crayon.

Because I bought the mold at the Dollar Store I did have one mold actually melt through. This is why I highly recommend using a cookie sheet or  a paper plate if using a microwave to contain the mess if a hole was to be made. I've never had this happen but not all molds are created equally!

Easy 4th of July Tie-Dye Shirts!

   I can't believe we are half way through June already! School just got out for us no the 14th and we have hit the summer running! ...